15.10.14

We've got pumpkins!


I made these felt pumpkins over ten years ago, but it's been a few years since I've displayed them as I thought they had become childish and old-fashioned.  A few weeks ago, they came to mind when I accumulated several rafia baskets for holiday decor.  Out came the pumpkins, tired and unkempt, and into the dryer for a little primping and plumping.  Of course, with all that heat, their felt stems unraveled and created a glue-y mess, so those had to go.  I've replaced them with real, tree branches, so now they look fresh like they've just been picked for the Fall harvest.

Tonight's dinner is another hearty one, chicken cassoulet.  It's one of my favorite dishes for cold weather.  I just love how the vegetables, especially the beans, thicken the broth after some time in the oven.  Mm mm, fork-tender chicken with loads of tasty veggies, yummy!

23.9.14

Feast!

Sheeez, it'b been a really looong time!  So long, I had to pause at the dashboard... .  Well, I am still here, keeping busy with all sorts of fun and silly activities.  But of course, I'm still terrible at keeping up here... 

It's officially Fall, and thankfully, the heat wave has also come and gone, which means it's cooled down to turn on the oven.  This morning, I baked ready-made, cinnamon rolls in Bon Maman jars and topped them with caramel, cream cheese icing.  I was relieved the glass did not break in the oven!  These were delicious and even better with cold-brewed, iced coffee.

Last night, we dined at home on produce from this weekend's farmer's market.  We started with chunky, heirloom tomatoes, burrata and parsley, drizzled with balsamic vinegar reduction and a pinch of truffle salt and freshly ground pepper. 

Then for the main dish, we enjoyed hambagu stuffed 8-ball zucchinis with sour cream gravy.  Actually, the sauce was a little loose.  It was more like a hearty bisque.  Still, it was scrumptious and super healthy.  We certainly got our servings of vegetables and then some!
 

For dessert, we ate even more veggies and had pumpkin ice cream on apple pie.  Alas, I was too tired and stuffed to bother with picture taking. 

1.10.12

Tiptoes for petite Blythe.

Oh, I'm still here!  Definitely here.  Here with another tutorial but on something a little different.  This year, I went crazy gaga over Littlest Pet Shop Blythes.  Didn't mean to, but now I have over 20 of them!  It was all too easy as they're pretty cheap compared to the Takara version.  I really thought I could stop myself there, but eventually, I found a couple lavender-haired Takara petites I had to have.  Yup, no shame about it, I've neglected much for these dolls!

Yesterday, I got two more from a dear friend visiting from Hong Kong.  She brought me Magical Wand and Playful Pigtails!  I was over the moon, but my glee quickly subsided as I soon discovered that Pigtails was broken below the waistline.  She was brand new, securely clamped to her package insert, but her pelvis was in smithereens!  I was crushed, heartbroken and couldn't even tell my friend, so I quickly stashed her away.

Soon as I got home, I unpacked her for a closer look.  I was relieved to find her torso still completely intact, so I promptly started on her repair.  It took some ingenuity but I was able to successfully restore her.  I was even able to preserve her with underwear! You can do the same for your handicapped dollie, or if you just want to give your flatfooted girl tiptoe feet, so she can also show off in heels!

You'll need:
broken Takara petite Blythe
donor Littlest Pet Shop Blythe
flexible spray paint for vinyl, like SEM products
fine grit sand paper
super, two-part epoxy
painter's tape
container filled with dry rice or beans or sand, etc.
1.  With broken Takara's head removed, clean off jagged parts by carefully cutting away with a small, craft saw at the waistline.  Then sand this area flat.  Take donor LPS body and cut at same waistline.  Take this lower body and also sand waist area flat.  Ensure both body parts are sanded flat, so they make complete contact when gluing.

2.  Mix well super, two-part epoxy and apply evenly a thin bead on both prepped surfaces.  You'll notice the Takara torso is hollow; dab just enough epoxy inside for additional support but not too much that it spreads to her arm joints.  Gently press together torso and lower body parts, aligning production, seam lines to ensure she's straight.  Wipe off excess epoxy with ethanol or rubbing alcohol.  Stand assembled body in a container filled with rice until epoxy is fully cured according to its directions.

Many of you may already be happy with your new petite body after the second step, but if you're in a treating mood and would like to properly cover your girlie's parts, you can follow the next few steps.

3.  Wipe away existing panties with acetone or ethanol.  Actually, if you're proceeding to this process, I highly recommend doing this prior to gluing body parts.

4.  Mark panty lines by masking off the rest of the body with painter's tape.  You should still have your dollie's head detached at this point (even though I show mine with hers attached).

5.  Create panties by spray painting with desired color.  Remove tape after paint dries.  Reattach her head, and viola!  Your previously ailing girl is once again alive and kicking!  Enjoy!

7.3.12

rock urchin.

Nope, I have absolutely not been able to put down the crochet hook, and last night, I started making these rock urchins.  The sudden urge came yesterday morning when I thought of crocheted stones, don't know why, but I immediately went through my stash of yarn.   I found the only ball of thin thread, and it was in natural!  It was meant to be, I was really excited!  All I needed were rocks, and for these, I drove to a nearby shopping center and picked up these five rocks from a rock bed.  Shhh.

I did spend much of yesterday afternoon looking at a lot of these online just to get a better sense of different types of motifs.  I also reviewed a few crochet doily instructions because this project is all about covering rocks with doilies.  I ended up following a few steps of simple crochet patterns from Ravelry and used a method from the Purl bee to secure the motifs to the stones.  The most time consuming were the big eye (top, center) and leaf patterns, as I had to work these through without a pattern.  I simply had images to stare at so there was much unraveling.  As for the star motif, I used a general holiday ornament pattern.  Overall, this was definitely a wonderful and motivating project.  I especially enjoyed it since it offered instances of small victories. 

2.2.12

Still here. . .

Happy New Year!! Just in time a la Chinese calendar.

Hello, hello everyone! I am finally getting into creative mode again. It's been a long and hectic hiatus and my mind has certainly been on overdrive with all sorts of fun new projects. I'm starting off with a new, sweetheart owl pincushion design for Valentine's day. I've used felt roses to adorn these cushions instead of the usual daisies. It's my first time making these and I've created them with felt strips in two colors. The alternating colors definitely give them more depth. Aren't they luscious and lovely?

If you look closer, there's an itty bitty ladybug peeking from underneath each rosebud.

I did pick up crocheting over the long holiday. I went a little mad whipping up kitchen cloths as Christmas gifts. I gave everyone I know a set, but then, they all seem to shy away from using them because they say they're too pretty! I really wanted to impress the necessity of waste reduction, but I think many of these ended up as display!


Of course, I had to try making some cute little dollies too!

10.9.11

Something wicked this way comes...

That is something wicked awesome! Since I've been doing a bit of swapping with Susy of the enchanted pumpkin, I now have an enviable collection of her positively adorable, crocheted hats. They have certainly inspired me to develop more animated doll eyes. These gals are just tickled to death with Halloween spirit! He he!


25.7.11

8.7.11

been down so long...

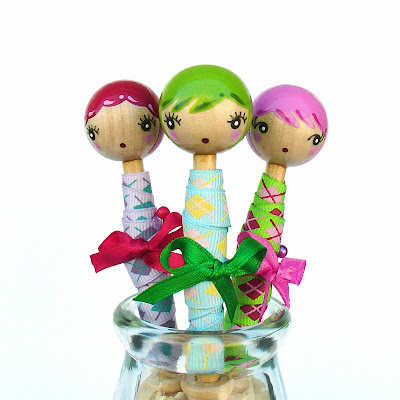
but still working! I just finished a new spool doll with new eyes, well, eyelashes. Star bursts! Pop! Pop!

12.11.10

paper ornaments.


Recently a good neighbor endowed me with her collection of champagne tops. I hesitated to take them at first as I thought these would only find their way to my batch of dust collectors. Then a couple of days ago, I stumbled upon some pretty paper ornaments whilst browsing online for holiday decor. I've made all my tree ornaments but they're from a few years ago and I wanted a more modern theme this year.

When I found several online instructions, the bottle caps immediately came to mind. The tops would make splendid finials for the ornaments! Very soon, the process became even more exciting as not only would I be upcycling bottle tops but old greeting cards too! I followed this tutorial and prepared both champagne and soda caps by driving a small nail through the center of each with a hammer. I used 22 gauge wire, looped at each end, instead of a hat pin; and for stability, I threaded the wire through a plastic straw. I've been preoccupied with this project in the last few days, and needless to say, I've accomplished a few good deeds indeed. If you don't have any crowns saved, I'm sure the local bar/restaurant will gladly part with theirs. -_^ Happy hunting and since you're already there, yes, you should treat yourself to a fine cold bottle of beer!